

Build Log: Planter Boxes
I thought it would be nice to add a bit of color to the front-side of our shed by adding some planter boxes to put flowers in. A quick and easy project to knock out in a weekend.
Quick Links
Starting Point
After we got the shed sorted out, it was kind of plain to just have a shed staring back at us from the deck. Just as something to spruce up the view with a bit of color, we picked up some potted flowers from Costco — now I needed to make one (or more) planters to put everything in. I debated a single, wide, trough-style planter vs. two or three planters flanking the windows with and without a bench. I ultimately settled on having a pair of smaller planters (easier to move!) flanking the window but without a seat so that it would be easier to work on the sides of the planter.
Step 1: Making the Box
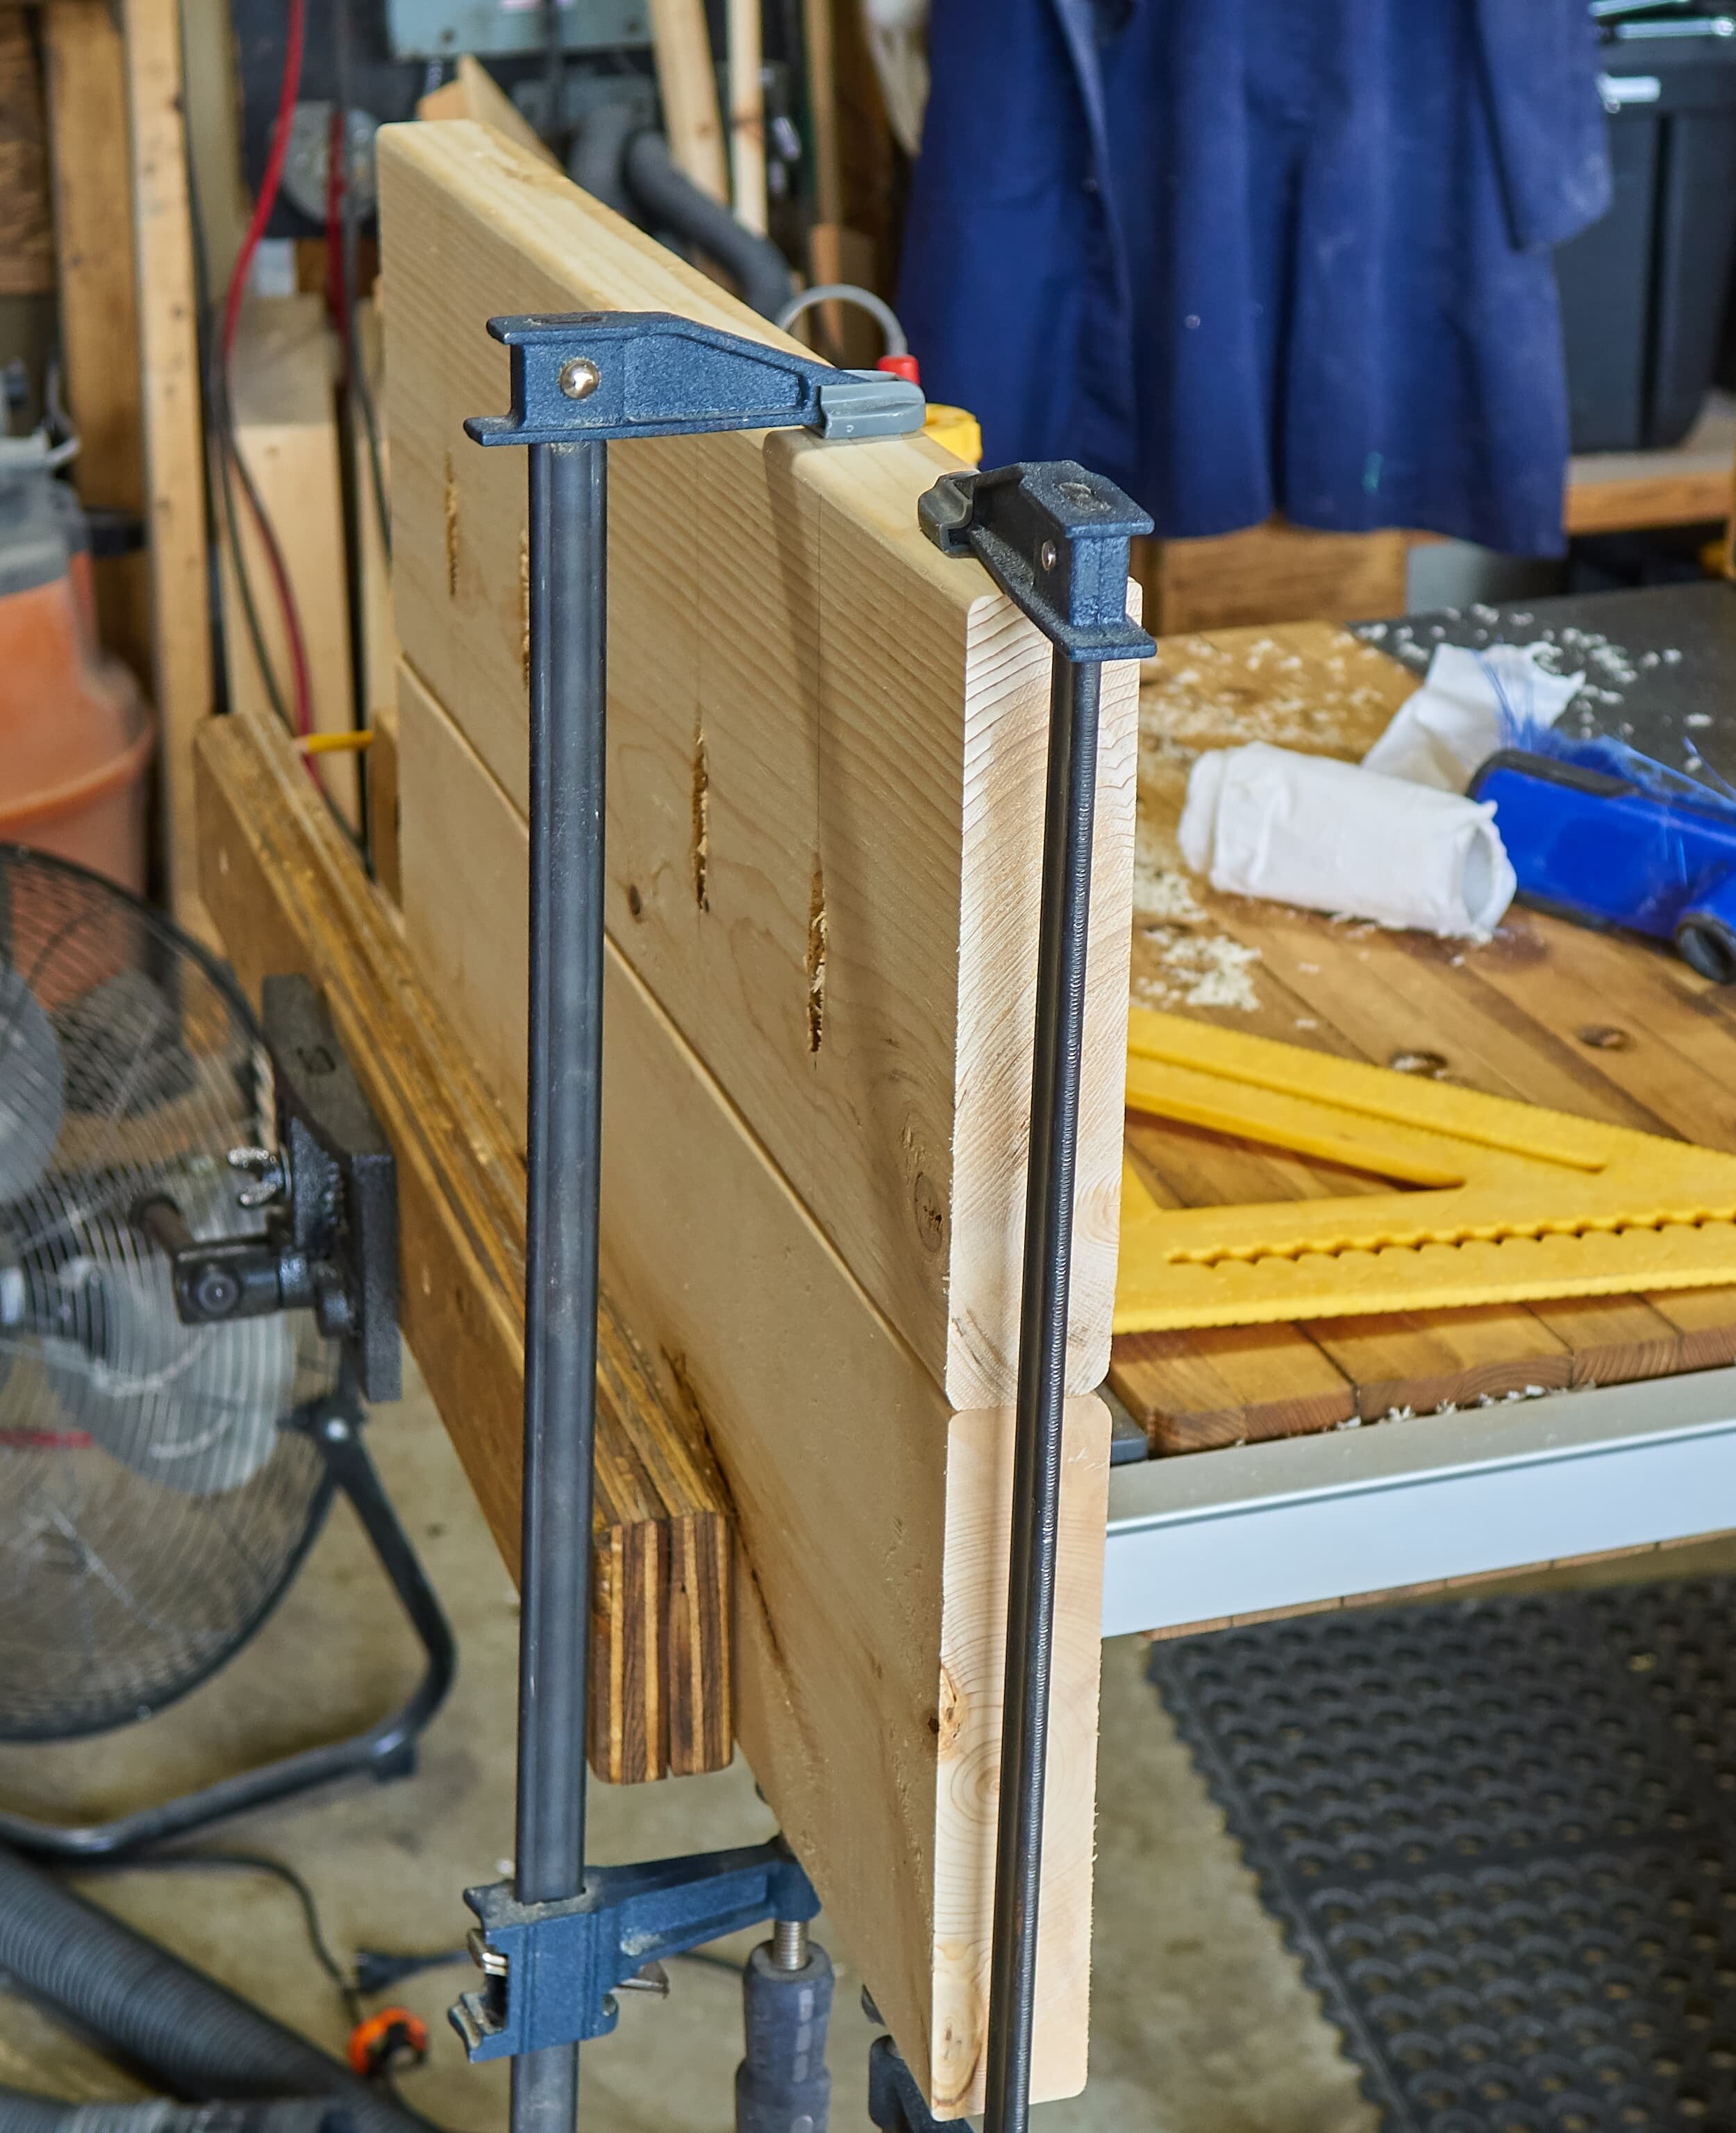
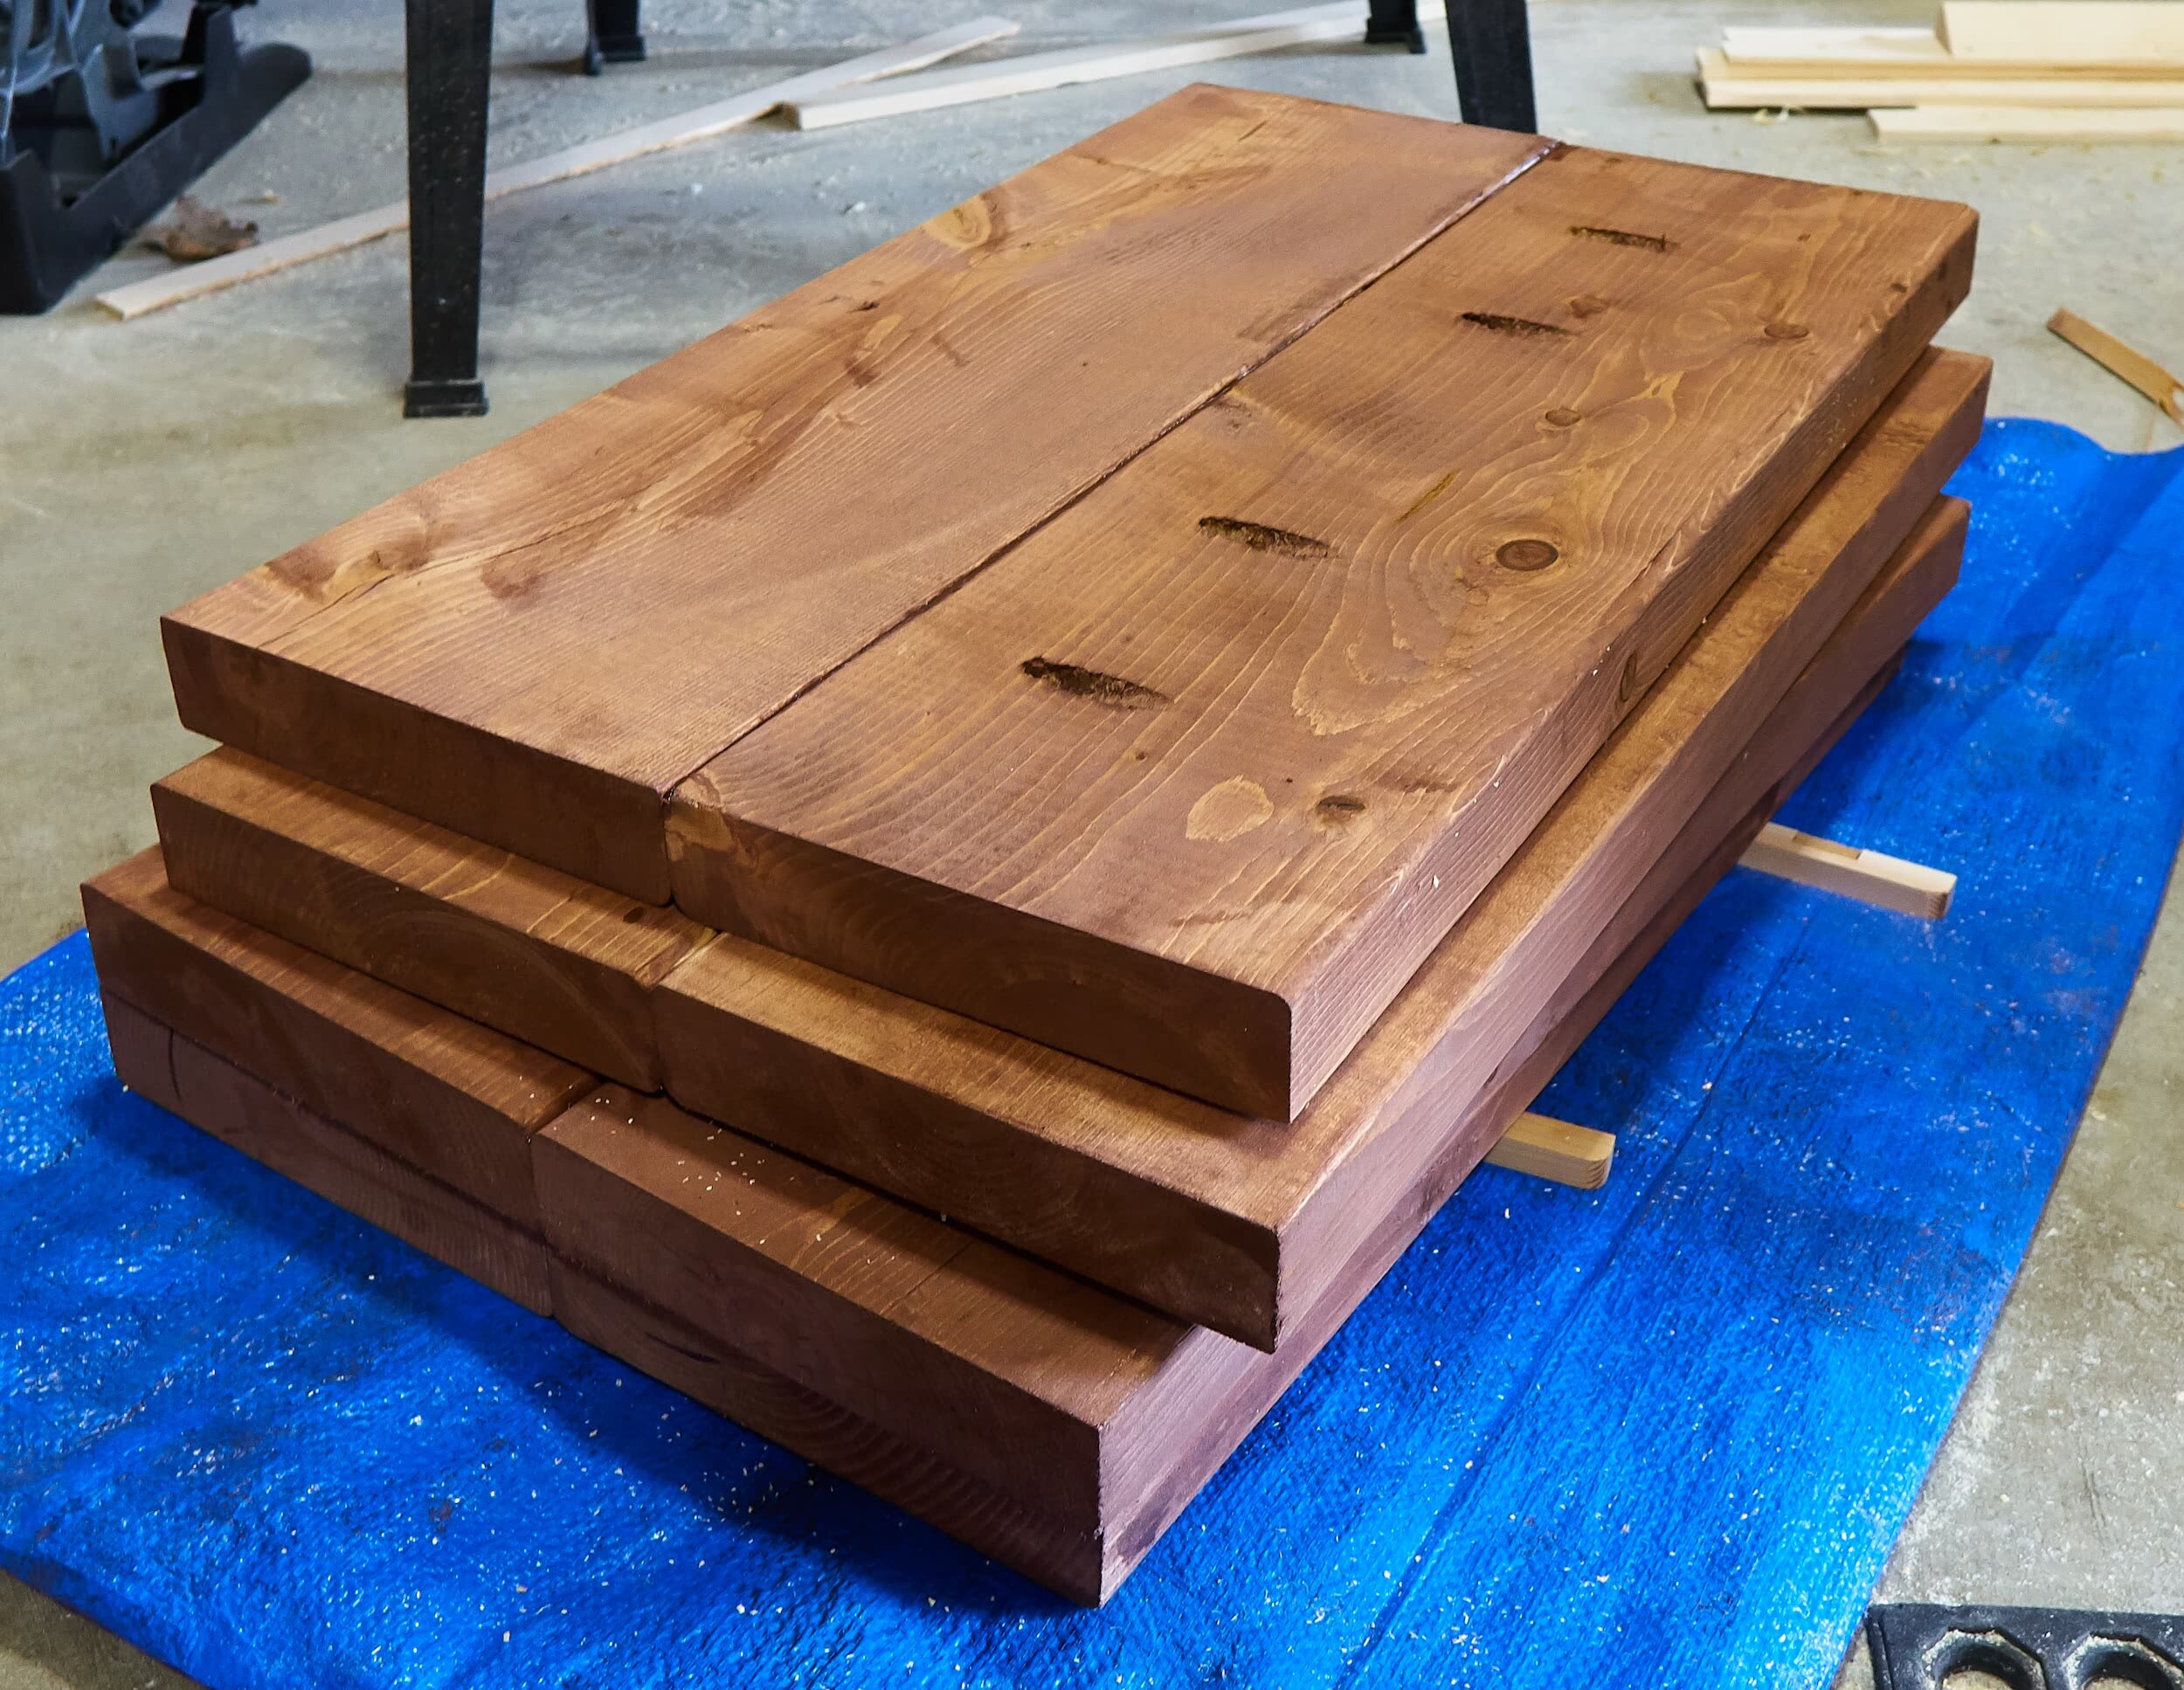
I went with a basic hollow-perimeter box made from standard 2x material. I specifically shied away from using pressure treated on the off chance that we might repurpose these planters for foodstuffs down the road and I didn’t want to think about leeching. This is really basic construction - 2x4s and 2x8s held together with pocket screws and I used exterior stain.


Step 2: Making the Legs
For the legs, I cut down a bunch of 4x4 posts that I had kicking around for a long time. Here, I’m cutting half the width of the 4x4 so that the box can sit flush with it allowing for all of the weight to get transferred down the leg. At the time, I luckily was borrowing an additional table saw for another reason, so it was super convenient to have each table saw dialed in for a specific cut.


Step 3: Attaching the legs, adding the base
With the box constructed and the legs cut out, it’s super easy to attach the legs to the box while its on its side, on the ground. After filling the screw holes, I added 2x4 stretched across the bottom of the box to support the soil load. Inside, I tacked some chicken wire in place to provide support for the landscape fabric.


Step 4: Finishing with trim
Here, I used some leftover tongue-and-groove cedar scraps I had from a different planter project to cover up the pocket holes and made sill plates to project the endgrain on the 4x4 post.


Milestone
Easy enough weekend project to knock out, and I think it turned out pretty well. It’s not shown in the pictures but I picked up 8 small pavers to place underneath the legs. I do anything fancy (gravel, sand, screen etc.), just sank the pavers into the ground roughly level and put the leg directly on top — reduces the direct ground contact up the legs.
Later on, we added some solar lights to this which was a nice touch.


Mix-ups, Surprises and Lessons Learned
I’d say this project was pretty straightforward. The only thing that didn’t work out (and there was no way to know at the time) was the exterior stain wasn’t the greatest - it started flaking within a year (we tarp the planters over the winter). Maybe a few coats of exterior polyurethane might make the difference in the future.
We eventually sold the planters — when I rebuild this, I’m going to try and add built in quick-disconnect irrigation.