

Build Log: DIY Truck Bed Divider
A few years ago, I bought a pickup truck and while having an open truck bed is nice when you need to move bigger things, for the remainder of the time, I wanted some way to divide the bed into “stuff I will want to grab all of the time” versus “everything else” (or stuff that I only need from time to time). Ford has a pretty nice bed divider — it’s lightweight, spring loaded and clips right into the BoxLink fasteners already pre-installed in my bed. The big downside is that it’s $400+ which [a] is more than I want to pay and [b] for that kind of money, I wanted more out of it.
While BoxLink is a somewhat proprietary system (I think), it is roughly compatible with the E-track which is more of an industry standard connector. Obviously the big trade off in building my own is there’s no way I can keep the weight down and I won’t be able to have a nice spring-loaded clip mechanism. On the flip side, I can add tie-downs to the divider and keep the cost way down.
This project was built for a 2017 F150 and works any truck with Boxlink (Ford) or E-track (generic).
Update!
I made a new bed divider! Click here to go to my redesigned bed divider - it’s lighter, more compact, can be installed/removed even while the tonneau cover is in place and I can even get lumber with the divider installed!
Quick Links
Rough Design
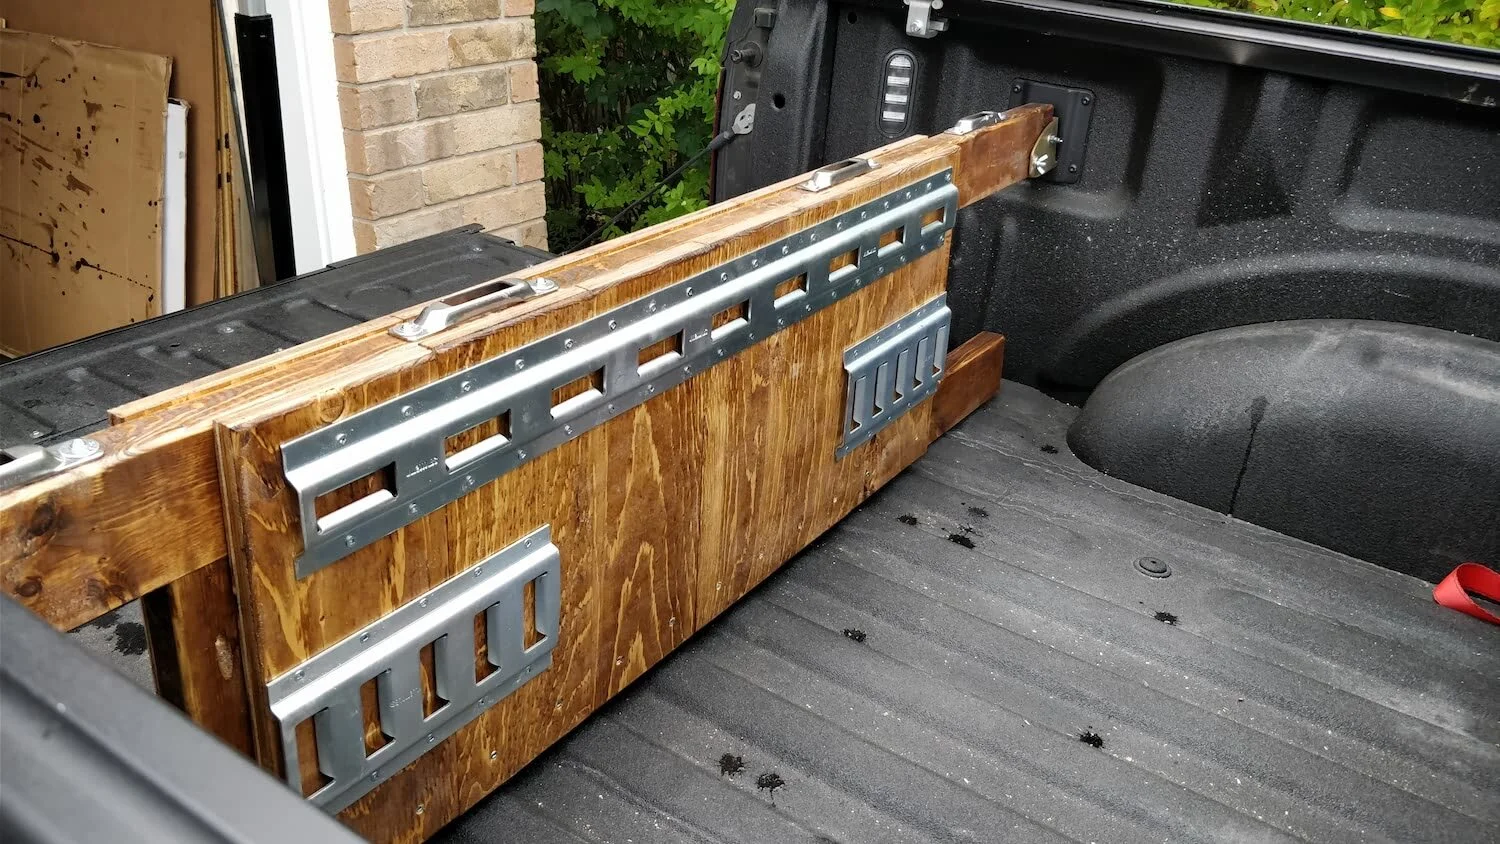
The cornerstone of this project will be an ‘e-track wood beam holder’. The e-track connector will clip into the BoxLink slot and I can secure a 2x4 to run across. With the beam running across the width of the bed, I can add some paneling to give me a more solid divider and a place to mount attachments.


Step 1: Raiding the scrap wood bin
First step is to install the beam-holder on both sides of the bed and measure the gap in between (since the beam-holder itself will take up some space); shave about 1/8” or 1/4” off to give yourself some wiggle room. This will make the upper-span and from there we add some vertical stretchers to a lower-span: the span will rest on the bed of the truck, resting against the wheel-well. Note that the bottom-span will not be as wide as the upper-span!


Step 2: Adding tie-downs
Now that I’ve got the basic divider built and in place, I can look at adding tie downs. I went with a couple of e-track strips to give myself plenty of options.


Step 3: Divider
Since I have an e-track rail on face of the divider which means I can add a divider to keep things from sliding around. Here, I’m using another e-track lumber holder to make this divider.


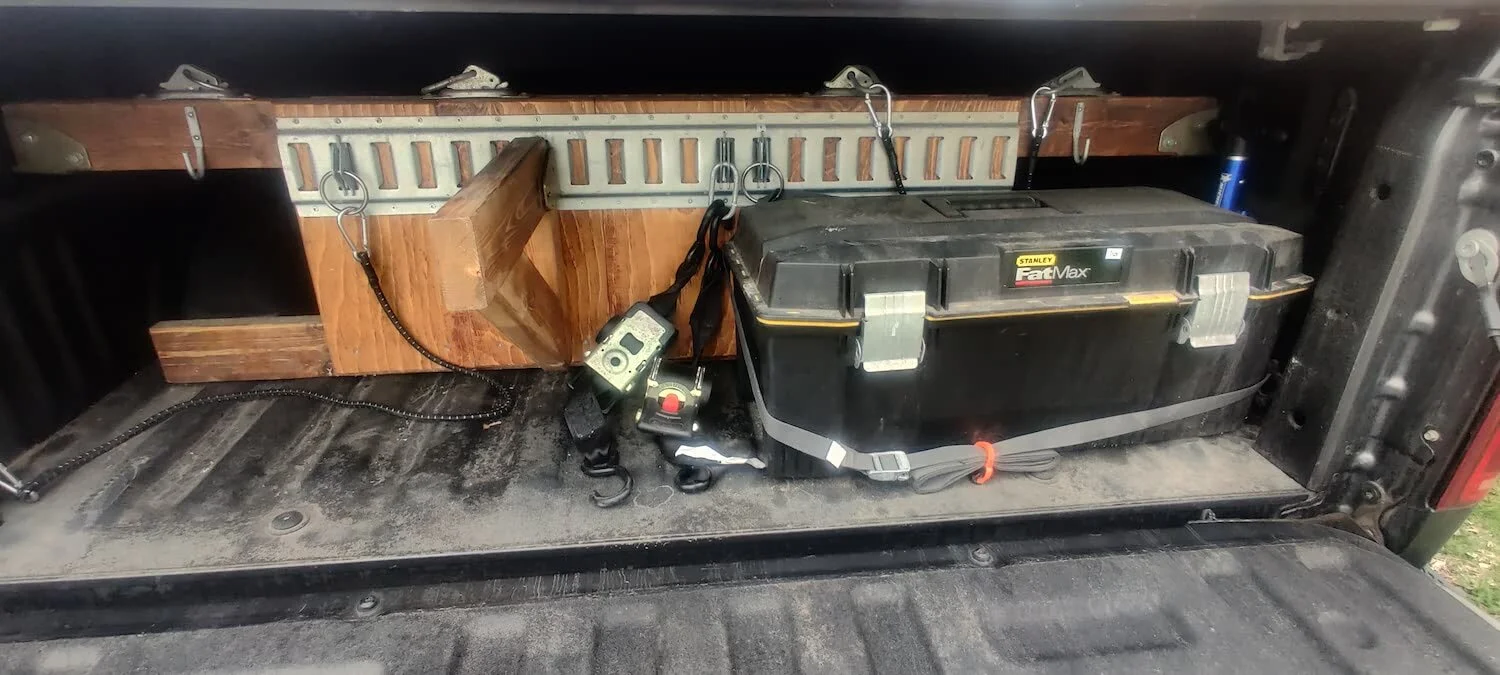
Step 4: Folding feet
So with the way the divider hangs across the two e-track lumber holders on each side of the bed, there is a bit of a tendency for it to ‘flop’ or ‘rock’ back and forth. On the tailgate side, this is almost eliminated by the toolbox I keep in the truck, but it can rock a bit towards the wheel-hump. By adding a flip-up ‘foot’ I can mostly keep the divider plumb at all times. By putting this foot on a hinge, I can flip it out of the way to install/remove the divider.


Milestone
This project was mostly a success, however, having built this I can see why some people might opt to pay for a nylon-based lightweight divider! I can pop my DIY divider in and out reasonably fast and I love how secure everything is, bolted down but it is cumbersome!
Mix-ups, Surprises and Lessons Learned
If I were to redo this project, I would actually consider the nylon one for being so much more lightweight. If I went down the DIY route, I would consider honey-combing the divider to reduce the weight. Otherwise, I’m super happy with the divider.

DIY Truck Bed Divider (Improved)
While this bed divider served me well for a few years, it’s clunky nature eventually got to me, and I got around to rebuilding it!